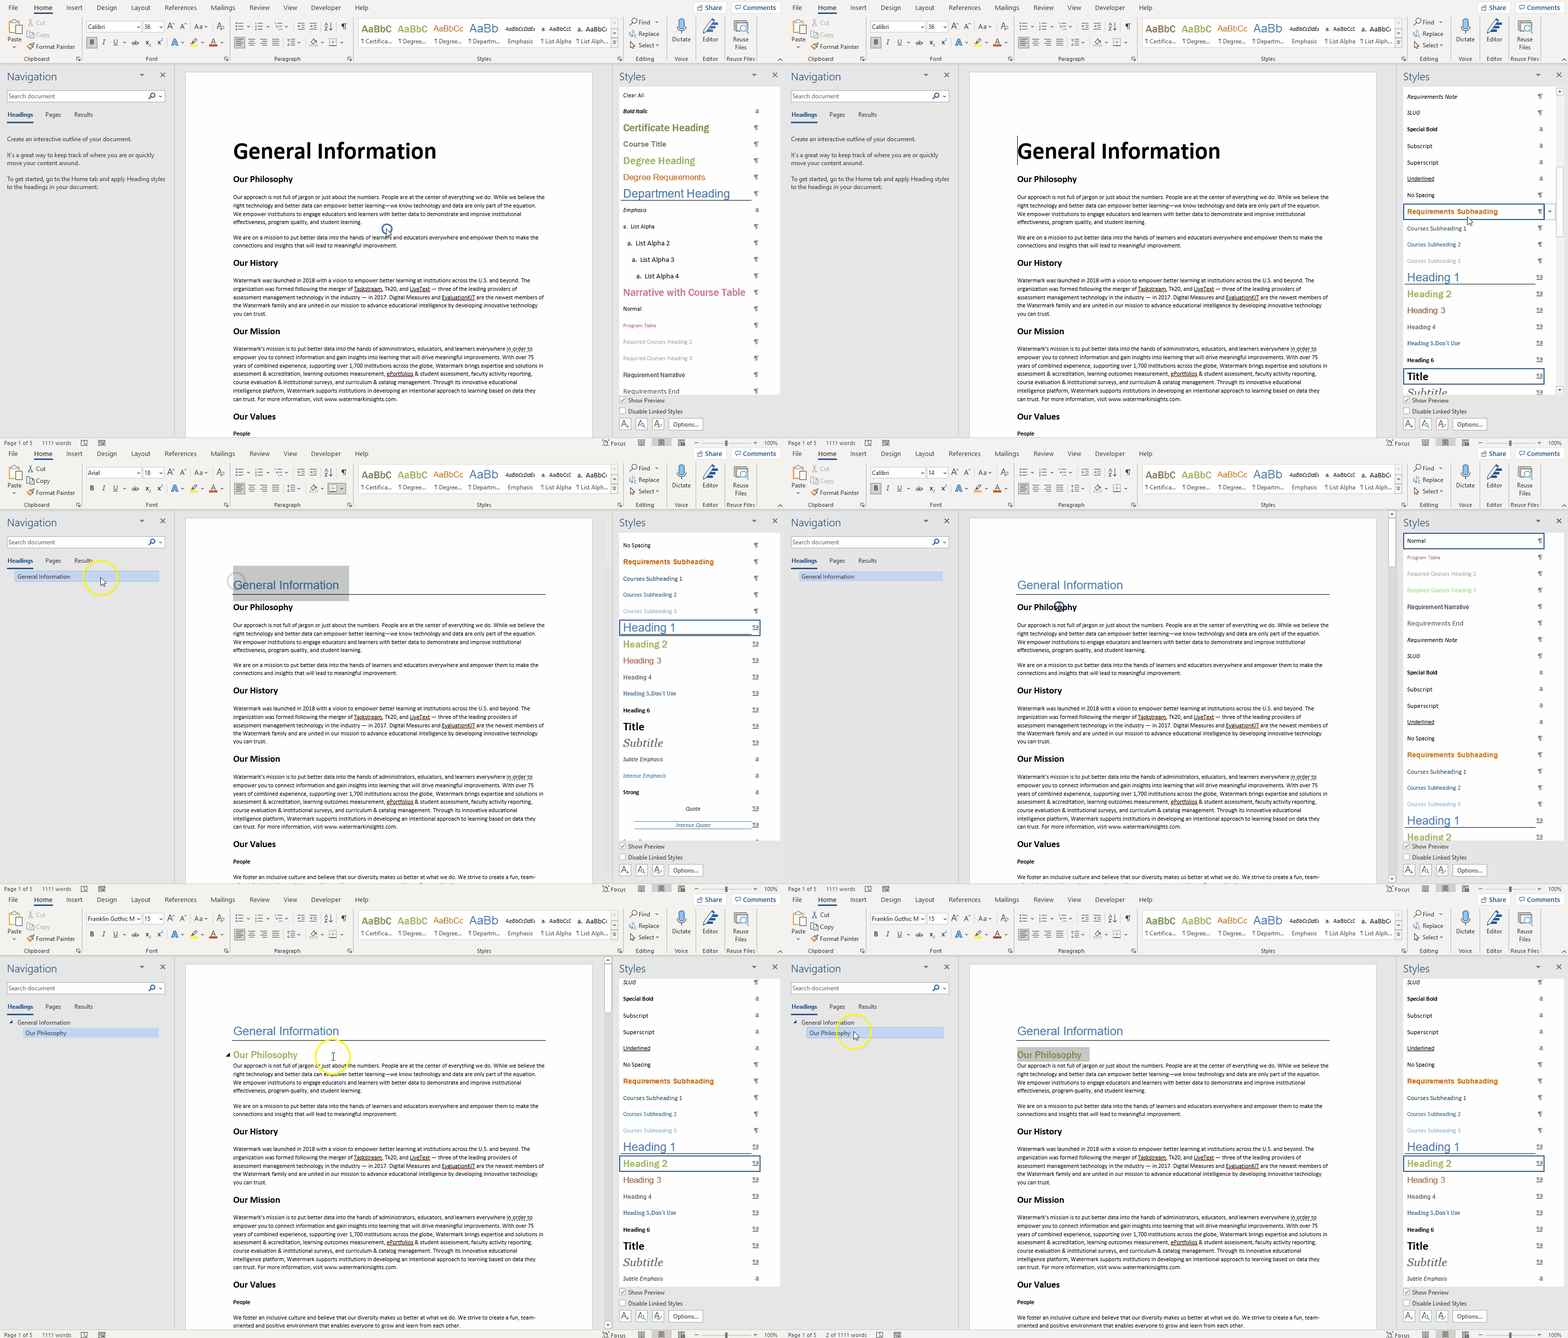
Attach Headings
Applying Headings 1-4 (GIF Below)
- Find Heading 1, Heading 2, Heading 3, and Heading 4 in the styles bar
- Label the first heading of the document as Heading 1. Heading 1’s represent the first level of your website's navigation when your catalog or handbook content is fully implemented. Note how it appears in the navigation pane on the left when applied.
- Apply the next numerical heading if a section should be nested within another section and belongs on its own page on the web. Each heading style applied represents a new web page in the navigation.
- Note headings must go in order. You can not skip a level.
- If you wish to emphasis a section but not create a separate page, “Bold” the text.
Note: Don’t worry about how the headings may look as you apply the styles. The headings are there to tell the system that these represent a new item/page and provides the correct organization. Any font, size, or color changes will be made directly to the web template.

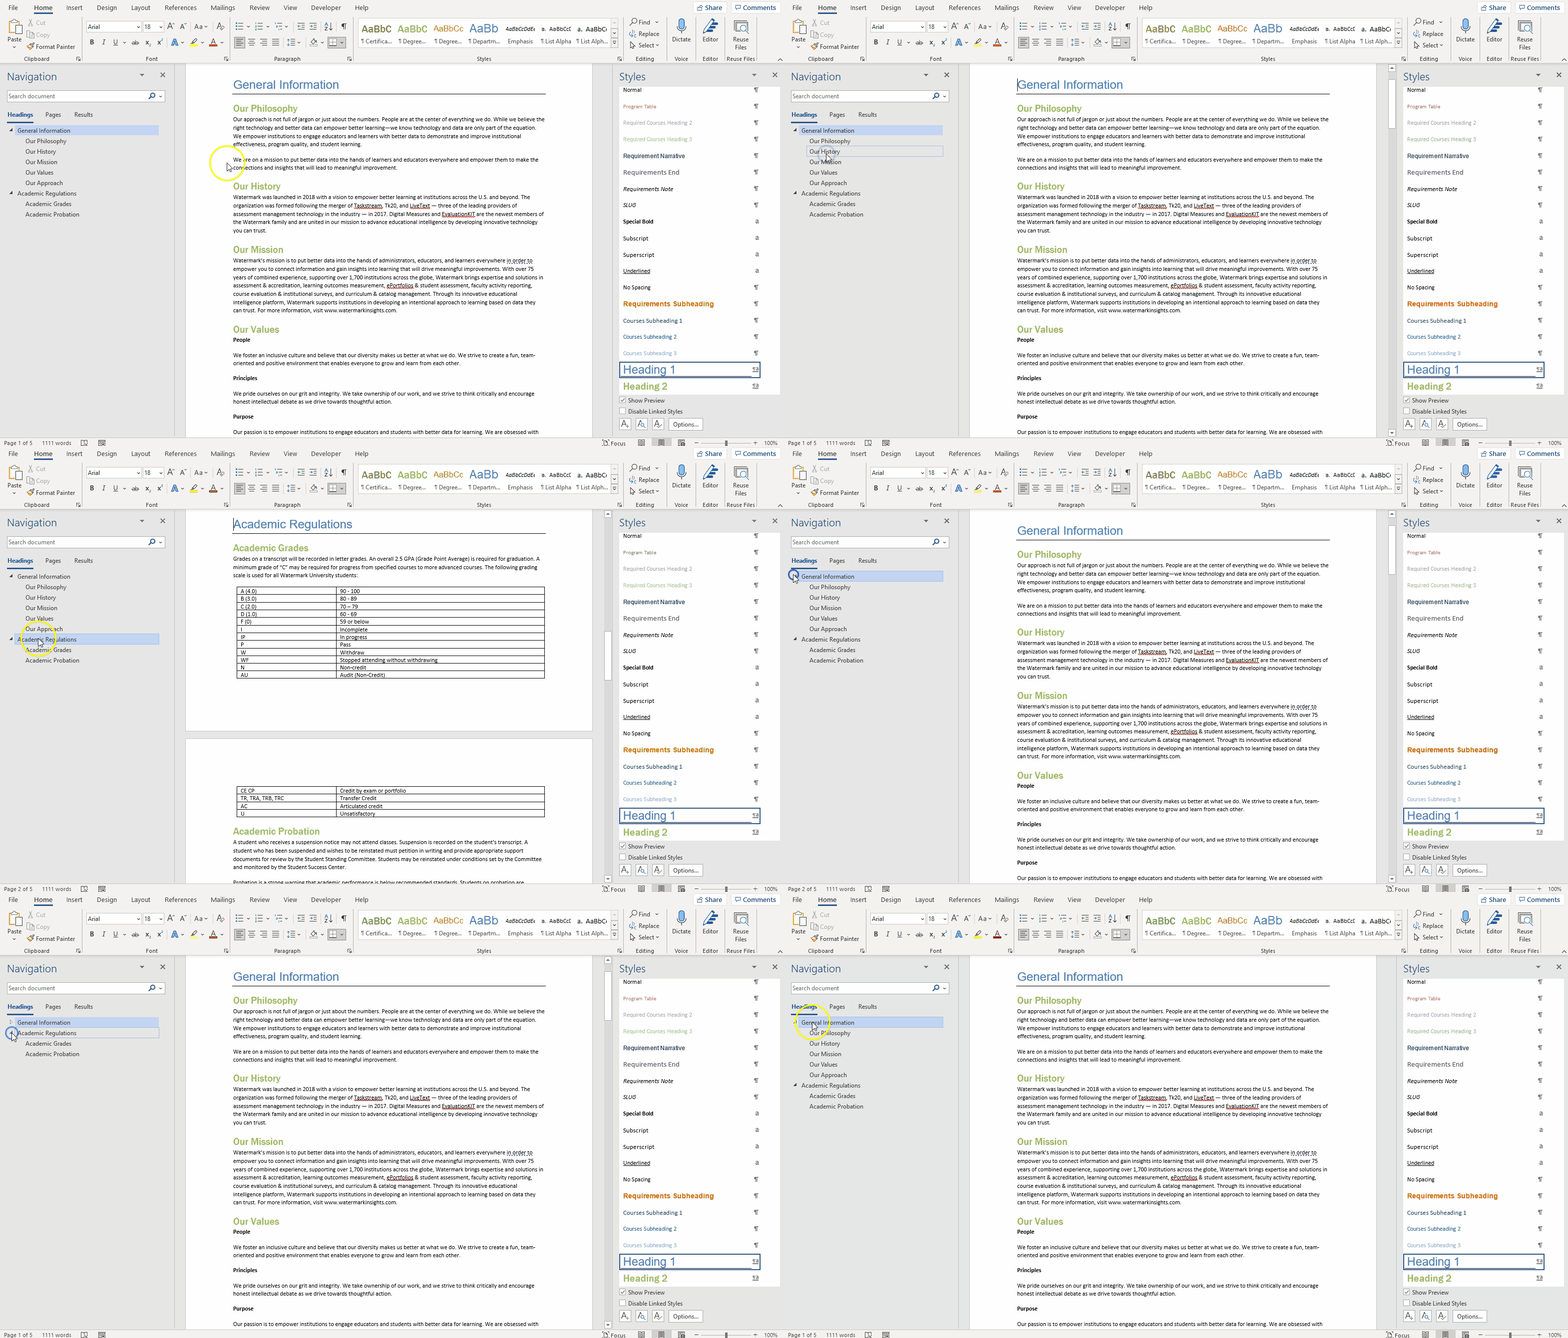
Expanding and Collapsing Sections: (GIF below)
- Click the arrow to the left of the content you want to expand.
